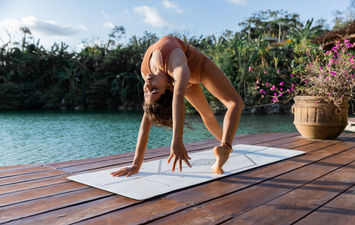
The alignment of standing yoga poses is built from the ground up, starting with the placement of your feet, which in turn governs the position of your hips. Pyramid Pose is a bit of a tricky set-up, both length-ways and width-ways, so we’re going to make full use of Liforme’s AlignForMe system. Once your feet are set, both hips will naturally square toward the front of your mat. Pyramid is a strong hamstring stretch so use blocks under your hands if they don’t reach the ground when you forward fold.
Benefits of Pyramid Pose
- Stretches the hamstrings and calve
- Activates the muscles around the hips and pelvis for stabilisation
- Improves core strength and foot strength

Foot Alignment
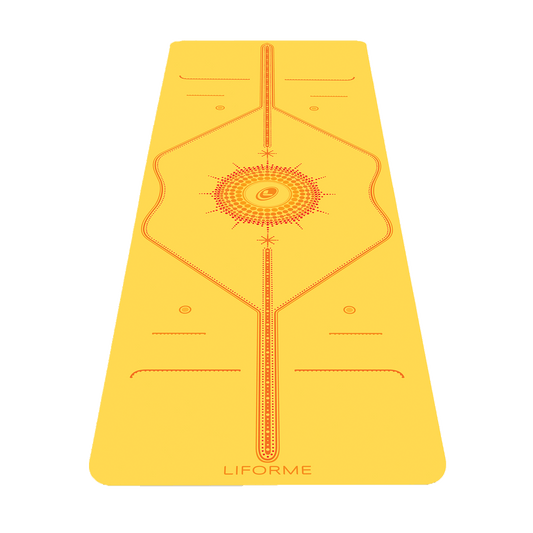
Back Foot: Align the inside edge of your foot with the 45-Degree Line. The classic set up for Pyramid is heel-to heel, meaning you can draw a perpendicular line from your front heel to your back heel. If you are using this alignment, place your back heel so that it abuts the Central Line. However, taking the heels a little (or a lot) wider apart gives the pose more stability and makes it more comfortable to turn both hip points to face the front of your mat. Happily, Liforme’s AlignForMe system has the flexibility to accommodate a wide variety of alignment preferences and body sizes. If you’re going with a wider stance, take your instep further up the 45-Degree Line.
Front foot: Where you place your front foot is going to depend on where you put your back foot. Point your front toes forward and position the inside edge of your front foot parallel to the Central Line. You can place your foot right on the Central Line for heel-to-heel alignment or take it closer to the outside edge of your mat for a wider stance. The distance between your two feet depends on how long your legs are. Three feet is an estimate, but your mileage may vary. The key thing is that the feet are closer together length-ways than they are in a Lunge or a Warrior I. Since this is a good reference point, we’re going to guide you into the pose from a Low Lunge.
Instructions
- Begin in a Low Lunge with your left foot forward and your hands on either side of that foot. Try aligning your left toes with the longer End to End Line on your Liforme Yoga Mat. (It’s fine to adjust your foot later if you want a shorter stance) Stack your left knee over your left ankle and be up on the ball of your right foot.
- Step your right foot in about 12 inches. Pivot on the ball of your right foot to release the right heel to the mat at a 45-degree angle. (Use the 45-Degree Lines!)
- Begin to straighten your left leg. Come up to your fingertips or use blocks under your hands if necessary.
- Adjust your feet so that you feel stable. This could mean taking your feet slightly wider. If your right heel isn’t on the floor, step that foot further forward until the heel comes to the floor when the foot is turned out 45 degrees.
- Bring your torso upright and hands to your hips to check that both hip points are pointed toward the front of your mat. If they aren’t, this is another reason to widen your feet toward either side of your mat.
- Keep a micro bend in each knee so that you are not locking out your joints.
- Begin to forward bend over your left leg, coming down with the hips square to the front and a flat back. Stop when you reach the point where your spine begins to round. Bring your fingertips to the floor or use blocks under your hands if necessary.
- After several breaths in a flat back position, you may round the spine to deepen your forward bend if you want to.
- To come out, bend your left knee and bring your palms to the floor to step back to a low lunge. Repeat the posture with the right leg forward.
Good to know
Revolved Triangle (Parivrtta Trikonasana) begins with exactly the same foundation as Pyramid Pose.