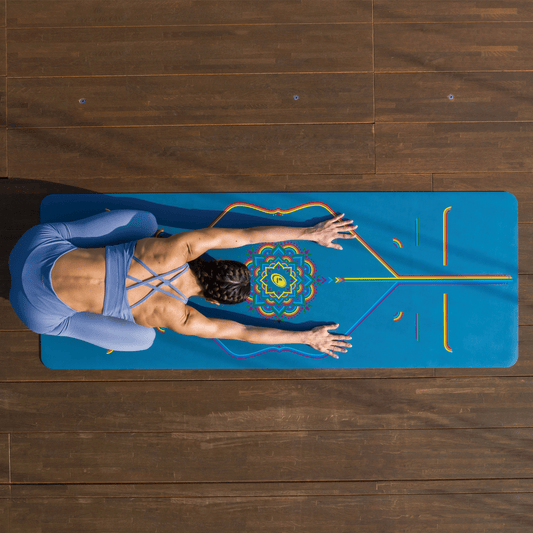
Monkey Pose is often called ‘the splits’, but it’s worth noting that the yoga approach to this posture differs significantly from the gymnastics and dance version. In yoga, we prioritize a forward-facing or ‘closed’ position for both hip points, while in other disciplines, the hips are more often in an ‘open’ position. (If you’re confused about the difference, read Closed vs. Open Hips: A Yoga Primer.)
Functionally, the rotation allowed by an open-hipped position means that it’s possible to take a split deeper. If you are accustomed to doing the splits in this position, you may not be able to take a closed hip split all the way to the floor, which is why props can come in very handy.
Monkey Pose Basics
 Sanskrit Meaning: This posture is named for the monkey god, Hanuman. In Hindu mythology, the goddess Sita was once separated from her husband, Rama, and imprisoned on an island (Sri Lanka). Hanuman rescued Sita by taking a giant step (a split, if you will) from the mainland to the island.
Yoga Level: Advanced
Pose Type: Seated
Benefits: Stretches the hamstrings, glutes, groins, and quadriceps. Improves core strength and body awareness.
Props: A blanket, a bolster, and several blocks can be put to good use.
Key Alignment Points to Keep in Mind
- Keep both hips facing the front of your mat. Your pelvis is in a Warrior I position, not a Warrior II position.
- Activate your hands and feet.
- Engage your quads and hamstrings.
Step by Step Instructions
- Begin in a hands and knees position with your hands at the front of your mat.
- Step your right foot between your hands.
- Scoot your right foot forward until your heel comes off the front of your mat. Flex your foot strongly so that only your heel is on the floor.
- Begin to slowly move your right heel forward, walking your hands forward as necessary. If you’re on a wood floor your heel will slide forward more easily.
- Once you come to your full extension, bring your hands to your hips to make sure they are both facing forward. If you need to adjust, curl the toes of your left foot under to walk that foot in and bring the left hip forward.
- If the back of your right leg comes to the floor, bring your torso upright and lift your arms overhead.
- Keep both hands and feet active. Engage your legs to create some resistance to the passive stretch.
- To come out, release your hands to the floor and scoot your right foot back. Come up onto your left knee and return to a hands and knees position.
- Repeat the posture with your left leg forward.
Tips for Beginners
- Props! There are many supportive ways to use props along your Hanumanasana journey. Start with blocks under each of your hands. As you move your hands forward, move the blocks along with them.
- Props under the front leg. Once you’ve reached your maximum descent, fill in the space under your front leg with a block or two or a bolster. With the front leg properly supported, you can safely lift your hands away from the floor and start to bring your torso upright.
- Be super patient. Never force the stretch. Splits don’t come naturally for many people so take it slow,
Variations
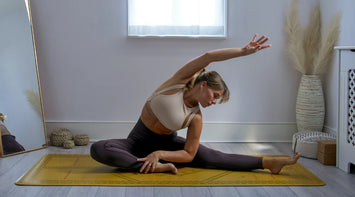
- Half Monkey Pose (Ardha Hanumanasana)
If you follow steps 1-3 above, you will be in Half Hanumanasana. This is a great variation for beginners. Use blocks under your hands if necessary. Flex your foot strongly and forward bend any amount over your extended leg.
- Eka Pada Rajakapotasana IV
On the opposite end of the spectrum, we have a variation for advanced practitioners.
- From Hanumanasana, bend your back knee (the left one, in this case) so that the sole of your foot is turned toward the ceiling.
- Puff up your chest and lean your head back as you bring the spine into extension.
- Bend your elbows so that your hands come behind your head.
- Reach your left hand for your left foot. Once you have a grip, reach your right hand to join the left.
- Aim your elbows at the ceiling as you drop your head back to meet your left foot.

Splitsville
If you’re looking at a full split thinking there’s no way you’ll ever get there, you’re not alone. The full posture is a lot but taking the Half Monkey off-ramp provides plenty of hamstring work for most of us. When you’re ready to go further, the judicious use of props will help you along.
As with any advanced yoga posture, progress comes through consistent work over time. Along the way, you may realize that it’s not that important whether the back of your front leg ever makes contact with the ground, because the process, not the result, is the practice.